Setting up blog categories in Showit (through WordPress) is a great way to organize your posts and make your site more user-friendly. In this post I’ll guide you step by step through creating categories in WordPress and connecting them to category pages in Showit
Your Designroina template includes one blog category page that you can duplicate for as many cateogries as you want to create.
1. Creating New Blog Categories in WordPress
First, we need to create the actual blog categories in WordPress. Here’s how:
Go to your WordPress dashboard.
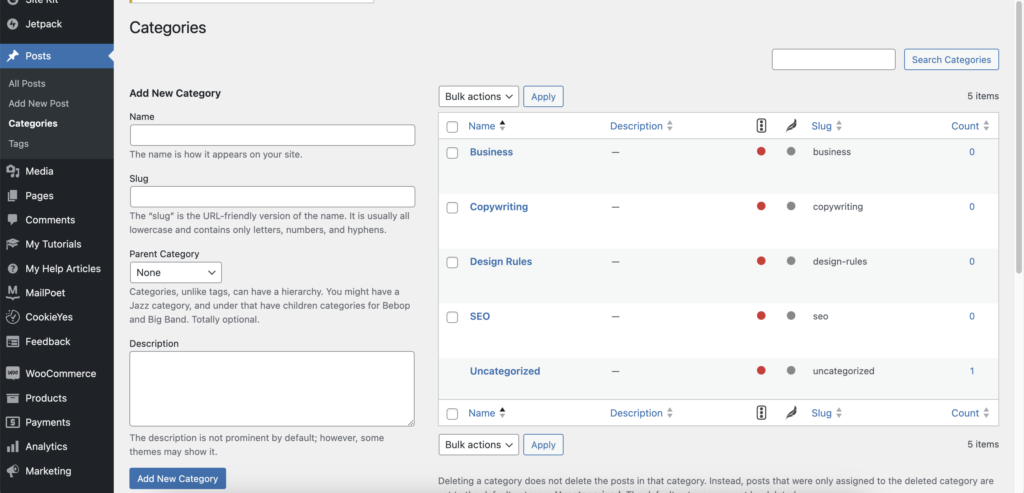
Click on Categories under the Posts section.
In the Name field, write the title for your new category.
Click the Add New Category button.
You will see your new category appear in the table on the right side.
Each category is automatically assigned a slug. This slug is essential for the next steps, so keep it handy.
2. Create Some Posts and Tag Them with Categories
Now that you’ve created categories, it’s time to tag your blog posts.
Go to Posts in WordPress.
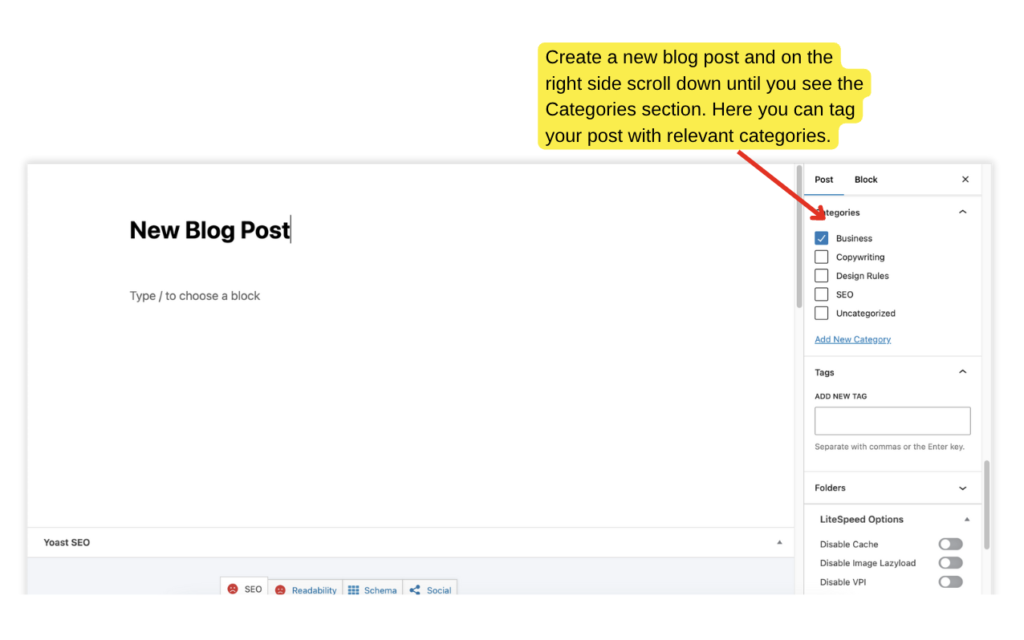
Create a new post, add the content, or edit an existing one.
In the Categories section on the right side, check the box next to the relevant category.
Publish the blog post.
3. Setting Up Category Pages in Showit
Now let’s go back to Showit to make sure each category has its own page that displays only posts from that category.
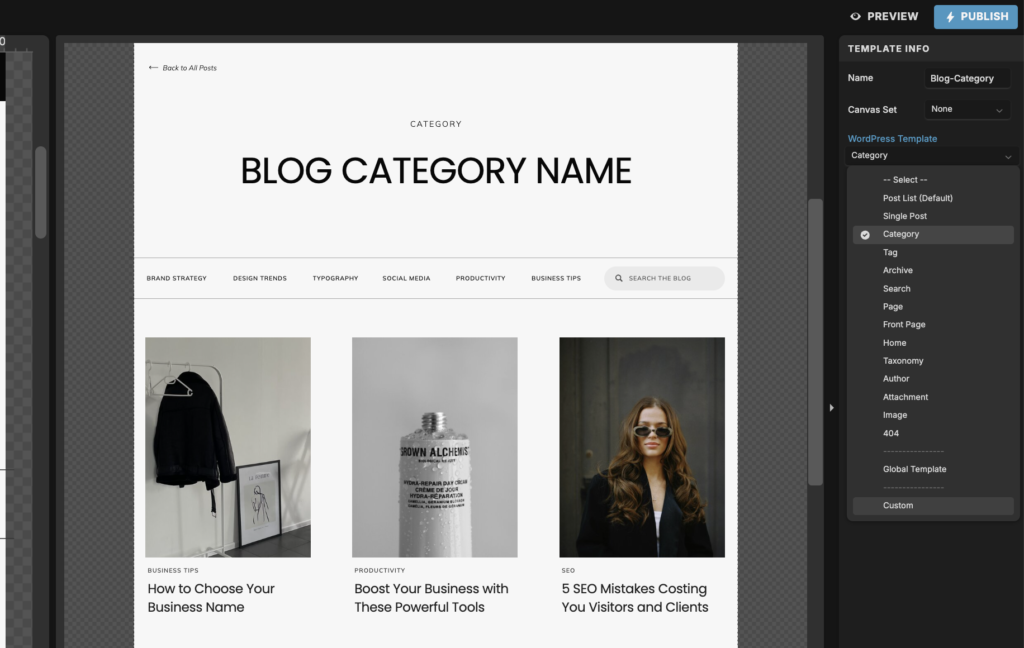
Open Showit and go to the category page in your template.
Select the entire page by clicking the page name in the left sidebar.
In the right-side panel, open the Template Info section.
In the field labeled Custom Template Name, type:category-[your-category-slug]
Go back to WordPress and copy the slug of the category you want to assign to this page. Paste it after “category-” in Showit.
Example: If your category slug is mindfulness, it should look be:category-mindfulness.
On the page itself, manually update the category name in the text section to reflect the category you’re setting up.
With this you’ve told Showit that this page should only show posts from that specific category. Now you can duplicate that page and repeat the process for all the other categories you have.
After connecting each category page in Showit to the correct WordPress category slug, you can customize the design of the category pages in Showit – like the hero section, page title, intro text, background color, image, etc.
*** The Ravenna website template has a simplified category page setup. In Ravenna you don’t have to duplicate the category pages because they’ll automatically display the right category title in the hero section. However, if you want to have more control of each category page design (like customizing the description, hero section background, and other details), you can replace the placeholder title with a static title and change the PageTemplate Info from Category to Custom. Then, follow the steps above to duplicate the pages and create a separate page for each category.
Ravenna Category Page Setup
4. Final Touches
Ensure that the page name in the Site Tab matches the category name for easy navigation.
Double-check that all slugs are correct and match the categories created in WordPress.
Preview the site to make sure each category page displays the correct blog posts.
5. Linking Category Pages in Menus
After publishing your category pages, link them in your category menu to ensure visitors can easily navigate between them.
Go to the Site Tab in Showit.
Select the Blog Home Page or any page with a category menu.
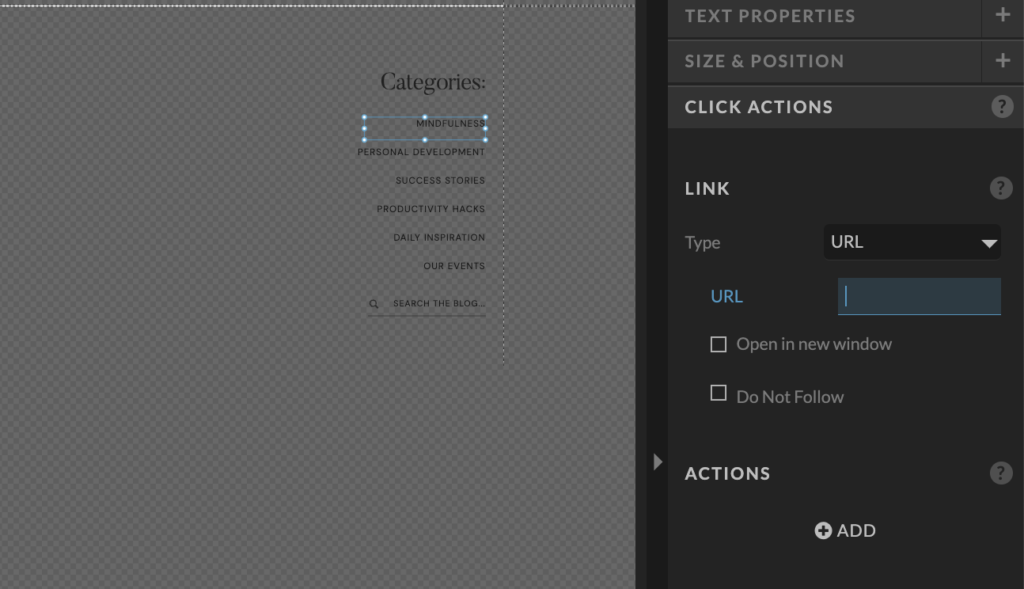
Click on the Category Menu in the design canvas.
In the right-side panel, open the Click Actions section.
Copy the URL for each published category page.
Assign each category page URL to the relevant button in the menu by pasting the link under the URL Click Action.