How to Add Custom Fonts to Showit

How to Add and Use Custom Fonts in Showit (Without the Headache)

Adding custom fonts to your Showit site is one of the easiest ways to make your website look unique and stand out. If you’re tired of using the same fonts as everyone else, let’s get that personalized typeface uploaded and looking sharp on your site.

Whether you bought a font from Creative Market, MyFonts or another source, Showit makes it easy to upload and use them across your site. Just make sure you bought the correct font license for use on website.
What You Need to Know:

  • Showit supports WOFF files only. No TTF, OTF, or WOFF2.
  • Adobe Fonts aren’t supported.
  • Some WOFF files may not render properly if not designed for web use.

Step 1: Get Your Font in WOFF Format

  • If you only have the font in TTF/OTF, use converters like Font Squirrel or Transfonter to transform the font to WOFF format.
  • Always check licensing to ensure you can use the font on your website.

Step 2: Upload the Font to Showit

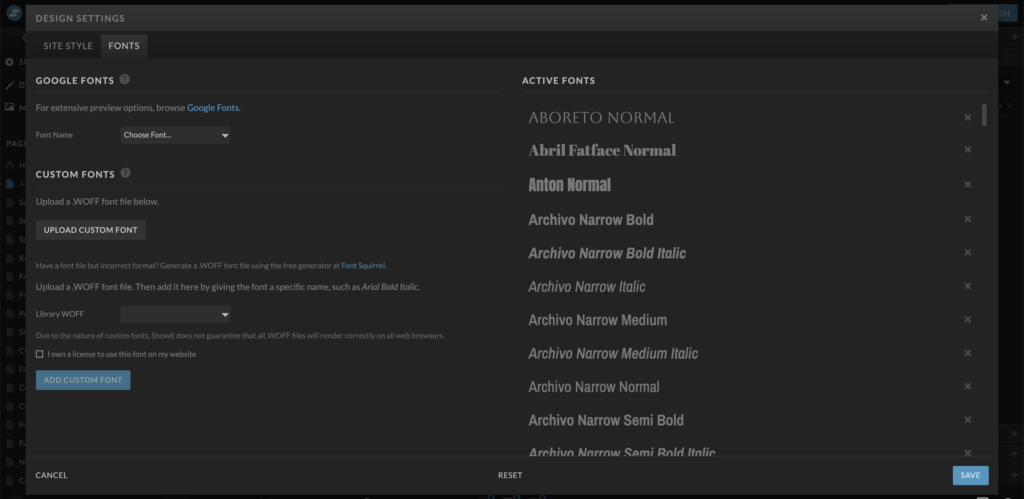
  1. Go to Design Settings in Showit.
  2. Click the Fonts tab.
  3. Select Upload Custom Font and choose your WOFF file. (I suggest making a media folder for all your font files in order to keep them organized)
  4. After uploading, select the font from the Custom Fonts dropdown.
  5. Name your font and confirm licensing.
  6. Hit Add Custom Font and click Save.

Step 3: Apply the Font to Your Site

  1. Select any text box on the page.
  2. In the right panel, under Text Style, choose your custom font from the font dropdown.

Troubleshooting: Font Not Showing?

If your font isn’t appearing:

  • Clear your browser cache and refresh the site.
  • Double-check the file format (it needs to be .woff not .woff2).
  • Ensure the text box isn’t inheriting styles from another element or custom css code.