This setup lets your podcast episodes populate automatically across your site using your Showit templates.
Whenever you publish an episode, and it will:
No manual updating of episode lists.
This guide walks you through exactly what needs to be done to set this up.
With the dynamic setup:
Once connected, you don’t manually edit episode sections again.
This setup makes sense if:
If you’re just starting out and want to launch fast, the static setup is better.
If you want something structured and future-proof, this is it.
This setup:
You do not need to understand WordPress deeply.
But you do need to follow the tutorials step by step carefully!
Alternatively you can book a Half VIP Day and I’ll handle the full dynamic setup for you.
Here’s everything you’ll do, in order:
That’s the full scope of work.
A Custom Post Type is simply a dedicated content type just for podcast episodes.
This allows you to:
Follow this CPT tutorial step-by-step to create your custom post type (CPT) for podcast episodes. Name your new Custom Post Type something simple and straightforward like “Podcast Episodes” or just “Episodes”
➡️ Follow the linked CPT tutorial and complete this step fully before moving on.
Now you’ll tell Showit where to pull episode data from.
First you need to find your exact new Custom Post Type slug (a slug is basically just the CPT name but generated in a specific way without any spaces. It’s important that you get the exact correct slug because its job is to connect your WordPress content with the Showit template).
To find your CPT slug: open the CPT plugin from your WordPress Dashboard > Registered Types/Taxes > find your post type in the table and copy the name. In the screenshot below you would copy “podcast-episodes”

This slug is what connects WordPress episodes to the Showit layouts. Copy it.
Now you need to paste that slug into dynamic Showit sections:
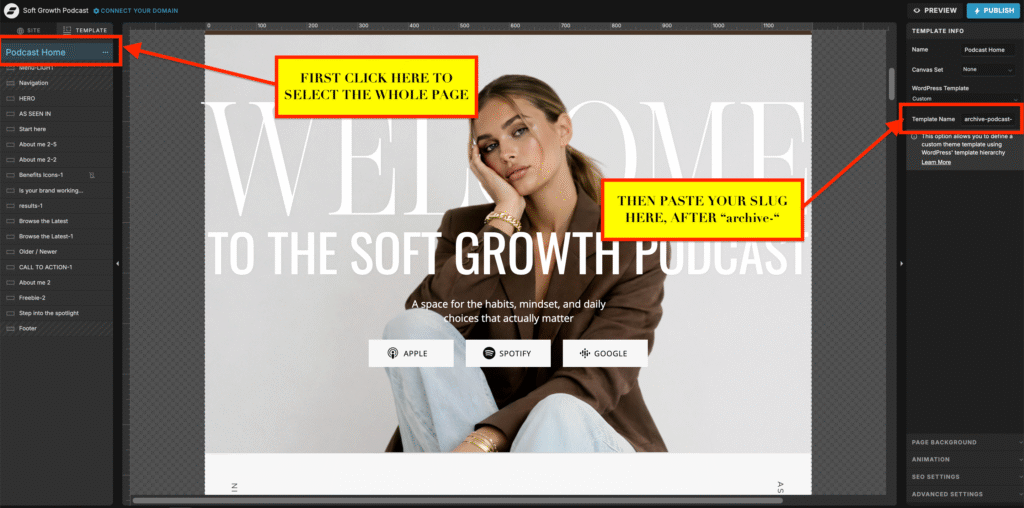
Go to Podcast Home Page (Blog Template Version), and select the whole page (not any section inside it, use the left side panel and click on the page name – see screenshot below). Here under Template Info everything is set up to work correctly, the only thing you need to do is to paste your slug after in Template Name field after the word “archive-“. So it should be “archive-yourslug”. For example if your slug is “podcast-episodes” the Template Name field should have “archive-podcast-episodes”. See screenshot below:
This same thing should be repeated on Podcast Simple Archive page.
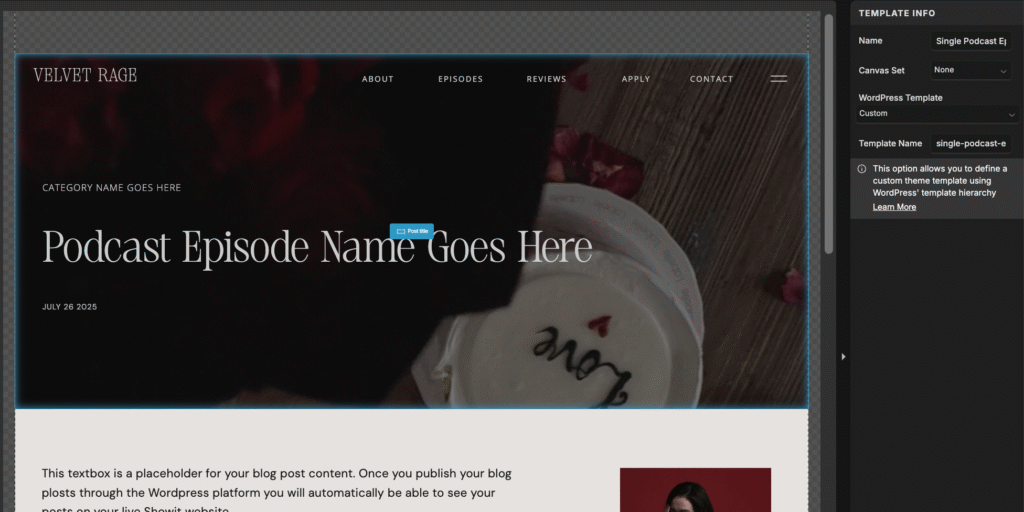
On the Single Podcast Episode page, you should do the same step but instead of words “archive-” you should put “single-” so if your slug is “podcast-episodes” it would be “single-podcast-episodes” – see screenshot below
And finally on the Podcast Home Page (Blog Version) – Select the Featured Episodes Section and in the right side panel under Canvas tab, paste your slug only into Post Type Slug field (See the screenshot below)

Once everything is connected, publishing an episode looks like this:
That’s it.
Your episode will automatically:
You never touch the episode list manually again.
For some of the episodes inside WordPress you should add a tag “featured”
These episodes will appear on the Home page under featured/popular episodes.
Before considering this “done”:
If something doesn’t show:
Almost all issues come from small mismatches, not from doing something wrong.